
P0300 means your vehicle’s computer has detected a random or multiple cylinder misfire, not a problem tied to one specific cylinder. The immediate priority is confirming it with an OBD-II live scan, and if the check engine light is flashing, you should limit driving to a short trip to a shop rather than continuing on a long commute.
TL;DR:
- Confirm P0300 with a live scan and review misfire counters before replacing parts to avoid unnecessary repairs.
- A flashing check engine light indicates a severe misfire that requires immediate short trip and repair to prevent catalyst damage.
- Common causes include worn spark plugs, failing coils, vacuum leaks, or fuel delivery issues, with mechanical faults being less frequent but costly.
- Diagnostic steps involve visual inspection, live data testing, swap tests, and testing fuel pressure and compression for accurate fault localization.
- Once plugs and coils are replaced without improvement, professional testing tools are necessary to identify wiring, sensor, or mechanical problems.
Table of Contents
- What does P0300 actually mean?
- Symptoms and urgency: what you’ll feel and when to stop driving
- Common causes: ignition, fuel, air, sensors, and mechanical wear
- Step-by-step diagnostic procedure: confirm, narrow, verify
- Common fixes and what to expect
- When to stop swapping parts and call a shop
- Technician perspective: common DIY mistakes worth avoiding
- Get a professional engine diagnostic in Irving
- FAQ
- Sources
What does P0300 actually mean?
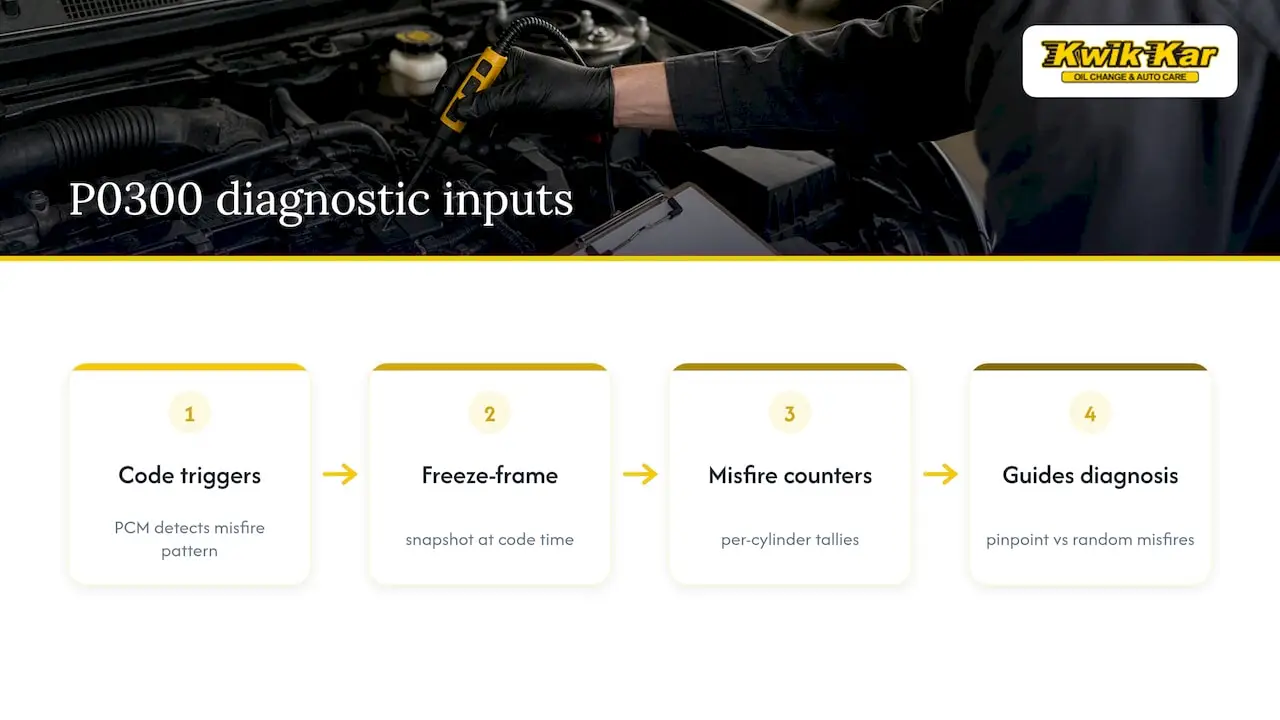
The powertrain control module watches crankshaft speed between firing events. When one or more cylinders fire late, weak, or not at all, engine speed dips briefly, and the computer logs that as a misfire. A pattern across multiple cylinders, or one that jumps around without a consistent source, sets P0300, labeled “Random/Multiple Cylinder Misfire Detected.” That is different from codes like P0301 through P0306, which point to one specific cylinder and usually mean a more isolated problem.
Freeze-frame data captured at the moment the code set, along with misfire counters that tally events per cylinder, are the two pieces of information that separate a quick fix from a guessing game. Pulling those numbers before touching any parts saves time.
Symptoms and urgency: what you’ll feel and when to stop driving
A random misfire rarely hides. You’ll likely notice:
- A rough or shaky idle, especially at stoplights.
- Hesitation or a stumble when you press the gas.
- A noticeable loss of power on hills or during highway merges.
- Worse fuel economy than usual.
A flashing check engine light signals a severe, active misfire that can send unburned fuel into the exhaust system, where it can overheat and damage the catalytic converter. A steady light means the issue is worth addressing soon. A flashing light means you should stop extended driving and get the vehicle to a shop as quickly as safely possible, ideally with a short, direct trip rather than a long errand run.
Common causes: ignition, fuel, air, sensors, and mechanical wear
Random misfires can come from several systems, and the fix depends entirely on which one is at fault. Likely sources, grouped by category, include:
- Ignition: worn spark plugs, failing coils, or damaged wires and boots.
- Fuel: clogged or failing injectors, a weak fuel pump, a dirty filter, or low fuel pressure.
- Air and sensors: vacuum leaks, a dirty or failing MAF sensor, or a stuck EGR valve.
- Mechanical: worn crank or cam sensors, timing misalignment, or low compression from a worn engine or a failing head gasket.
Common cause lists rank worn spark plugs, failing coils, vacuum leaks, and weak fuel pressure among the most frequent triggers, with sensor and mechanical faults showing up less often but carrying higher repair costs when they do.
Pro Tip: Don’t assume the most obvious part is the culprit. A single bad coil often sets a cylinder-specific code, while a random misfire across multiple cylinders points more toward a shared cause like fuel delivery, a vacuum leak, or a sensor feeding bad data to every cylinder.
Step-by-step diagnostic procedure: confirm, narrow, verify
A diagnostic-first approach avoids the most expensive mistake DIYers make: replacing parts one at a time until something works. Follow this sequence instead.
- Confirm the code. Read stored and pending codes, pull freeze-frame data, and check the misfire counters for each cylinder.
- Inspect visually first. Look at spark plugs, coil boots, wiring harnesses, and vacuum lines for cracks, corrosion, or loose connections.
- Watch live data under load. Use a scan tool while revving the engine or during a short test drive to see which cylinders misfire and under what conditions.
- Run structured swap tests. If counters point to one cylinder, swap a coil or injector with a neighboring cylinder and recheck the counter. If the misfire follows the part, you’ve found it.
- Test fuel and compression if ignition checks are clean. A fuel pressure test and a compression or leak-down test rule out a weak pump, clogged injector, or mechanical wear.
- Verify the fix. Clear the codes, road-test under the same conditions that triggered the original misfire, and re-scan after about two drive cycles to confirm it doesn’t return.
Record your findings at each step, including:
- The misfire counter value before and after any repair.
- Whether the misfire pattern changes with RPM or load.
- Fuel pressure and compression readings, if tested.
This record is what separates a confirmed fix from a hopeful one.
Common fixes and what to expect
Some repairs are reasonable for a confident DIYer, while others call for shop equipment and experience.
- DIY-friendly: replacing worn spark plugs, inspecting and reseating coil boots, and cleaning corroded electrical connections.
- Shop-level repairs: replacing ignition coils or modules, injectors, or a failing fuel pump, repairing vacuum or intake leaks, and addressing head gasket or timing-related mechanical faults.
Diagnostic-first testing saves money because it tells you which category you’re dealing with before you buy parts. A $200 repair for ignition components is a different job than a timing or head gasket issue, and the only way to know which one you’re facing is to test rather than guess.
Repair costs generally fall into bands: low for plugs, boots, or simple sensor cleaning, medium for coils, injectors, or vacuum leak repairs, and high for fuel pump replacement, timing component work, or anything involving the head gasket. What pushes a job into the higher band is usually labor time and whether the engine has to be partially disassembled to reach the part. For readers weighing a DIY spark plug job, our spark plug replacement guide walks through what’s involved.
When to stop swapping parts and call a shop
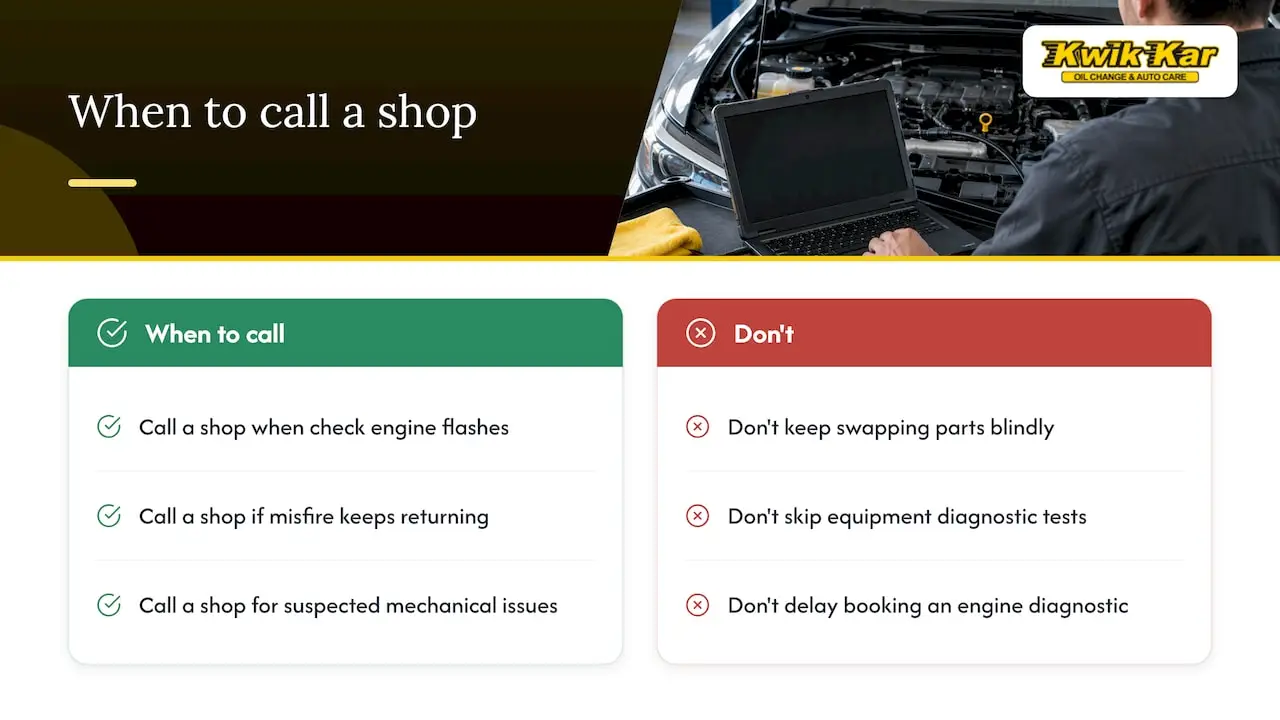
Once you’ve replaced plugs or coils and the misfire counter hasn’t improved, swapping more parts rarely helps. That’s the point to bring in equipment you likely don’t have at home: waveform capture for ignition patterns, fuel pressure and injector balance testing, compression testing, and electrical bench tests for wiring faults. Technicians run these checks and document every finding with a Digital Vehicle Inspection, including photos and video, so you see exactly what’s happening before any repair begins. A flashing light, a misfire that keeps returning, or a suspected mechanical issue are all good reasons to book an engine diagnostic.
Technician perspective: common DIY mistakes worth avoiding
The most common mistake we see is replacing a coil or set of plugs without recording a misfire counter beforehand, then having no way to confirm the fix actually worked. Wiring, connectors, and boots get overlooked constantly, even though they’re often the real cause.
Pro Tip: Photograph your scan tool’s freeze-frame screen or jot down the misfire count before and after any repair. That one habit turns guesswork into a verified fix.
— Kwik Kar
Get a professional engine diagnostic in Irving
A random misfire that survives a plug swap usually means the cause is hiding somewhere a visual check won’t find it, and that’s exactly what our diagnostic equipment and ASE-certified technicians are built to track down.

When you book an engine diagnostic with us, you get:
- Live-scan testing with misfire counter analysis across every cylinder.
- A Digital Vehicle Inspection with photos and video sent straight to your phone.
- A clear repair recommendation with no pressure to approve work you don’t understand.
If wiring or coil issues turn up during testing, our electrical repair service handles it under the same visit. Ready to stop guessing? Schedule an engine diagnostic with us today.
FAQ
How do I fix code P0300?
Start by confirming the code with a live scan and checking misfire counters per cylinder, then inspect spark plugs, coils, and wiring before testing fuel pressure or compression. The fix depends on what the data shows: it could be as simple as new plugs or as involved as a fuel pump or timing repair.
What sensors can cause a P0300?
A failing crankshaft or camshaft position sensor can cause timing-related misfires, and a dirty or faulty MAF sensor can feed the engine incorrect air readings that trigger random misfires. An EGR valve stuck open can also cause a similar pattern by disrupting the air-fuel mix.
Can I still drive my car with a P0300 code?
A steady check engine light with mild symptoms usually allows careful short-term driving to a shop. A flashing light means the misfire is severe enough to risk catalytic converter damage, so you should limit driving and get it checked right away.
Is P0300 expensive to fix?
Cost depends entirely on the cause: spark plugs and coil boots fall on the lower end, while fuel pump, injector, or timing-related repairs cost more. A proper diagnostic before any repair is the best way to avoid paying for parts that don’t solve the problem.
Sources
- P0300 – Random/Multiple Cylinder Misfire Detected | RepairPal
- P0300 field guide: random / multiple cylinder misfire | ClearTheCode
- Obd2
- Motor Vehicle Emissions Control. Book Seven, Catalytic Converter Systems | EPA