
Most nail punctures located in the center tread and of small size are repairable. A nail in the sidewall, shoulder, or bead area is not — that tire needs replacement, full stop.
Here’s what to do right now:
- Check your tire pressure with a gauge. If it’s dropping fast, do not drive.
- If pressure is holding steady and the nail is visibly in the center tread, drive slowly and directly to a shop.
- Do not remove the nail yourself. It may be acting as a plug and keeping air in.
- Avoid highway speeds and long distances until a technician inspects the tire.
- Mark the nail location with chalk or tape so it’s easy to find at the shop.
Pro Tip: A slow leak is still a leak. A tire losing even 1–2 PSI per hour can go flat before you reach a shop. Check pressure every 10–15 minutes if you’re driving to get it repaired.
Key Takeaways
A nail in the center tread measuring 1/4 inch or smaller is usually repairable with a professional plug-patch; sidewall or shoulder punctures and anything larger require tire replacement.
| Point | Details |
|---|---|
| Repairability rule | Center tread only, max 1/4 inch (6mm); sidewall and shoulder punctures cannot be repaired. |
| DIY plug limits | String plugs are emergency-only; always follow up with a professional demount and plug-patch. |
| Professional standard | A proper repair requires demounting, internal inspection, buffing, filling, and an innerliner patch. |
| Replacement triggers | Replace if cord is exposed, tread is at 2/32", or the puncture is outside the repairable tread zone. |
| Kwik Kar in Irving | ASE-certified technicians perform full plug-patch repairs with Digital Vehicle Inspections and documented repair receipts. |
Table of Contents
- What to do right now when you find a nail in your tire
- How repairability is decided: location, size, and angle
- How to use a temporary plug safely if you need one now
- Why the plug-patch method is the professional standard
- When you need to replace the tire instead of repairing it
- What a tire repair actually costs and how long it takes
- Temporary fixes and their real risks
- Kwik Kar handles nail puncture repairs the right way in Irving, TX
- Sources
- FAQ
What to do right now when you find a nail in your tire
Pull over safely as soon as you notice a problem. Turn on your hazard lights, find level ground, and set the parking brake before you do anything else.
Then run through this quick check:
- Look at where the nail is sitting. Center tread? Possibly repairable. Sidewall or shoulder? Stop driving and call for a tow or roadside assistance.
- Listen for hissing air near the puncture. A slow hiss means you have some time; a loud rush means the tire is failing fast.
- Use a tire pressure gauge to measure PSI. Compare it to the recommended pressure on the sticker inside your driver’s door jamb.
- Note any pulling to one side or vibration while driving — both signal that the tire is losing structural integrity.
- If pressure is low but not critically so, inflate to the recommended PSI just enough to reach a shop safely. Keep your speed under 50 mph and your distance short.
Do not attempt to remove the nail on the roadside unless you have a spare ready to mount. The nail itself is often sealing the hole.
How repairability is decided: location, size, and angle
Not every puncture qualifies for repair, and the rules are stricter than most drivers expect.
According to USTMA guidelines, a puncture is only eligible for repair if it is located within the tread area and measures no greater than 1/4 inch (6mm) in diameter. Shoulder and sidewall punctures are not repairable under any circumstances.
The repairable zone is narrower than it looks from the outside. A puncture that appears to be on the tread can still fall within the shoulder or belt-edge area depending on the angle of entry. The USTMA’s puncture repair procedures note that even tread-area punctures must be rejected if they are within approximately 1/2 inch of the shoulder or if the angle of penetration runs into the shoulder belt.
Key repairability rules at a glance:
- Puncture must be in the center tread, not the shoulder, sidewall, or bead area.
- Maximum size: 1/4 inch (6mm) in diameter.
- Angle matters: a steeply angled puncture that enters the shoulder belt is non-repairable even if the entry point looks like tread.
- Repairs cannot overlap. Two punctures close together may force a full replacement.
- A shop must demount the tire to inspect the inside before confirming repairability.
Industry standard: A tire that looks fine on the outside can have cord damage, innerliner tears, or belt separation that only shows up once the tire is off the rim. That’s why visual-only assessments from the outside are never enough.
How to use a temporary plug safely if you need one now
A string plug kit is an emergency tool, not a permanent fix. Use it only to get to a shop, not to declare the tire repaired.
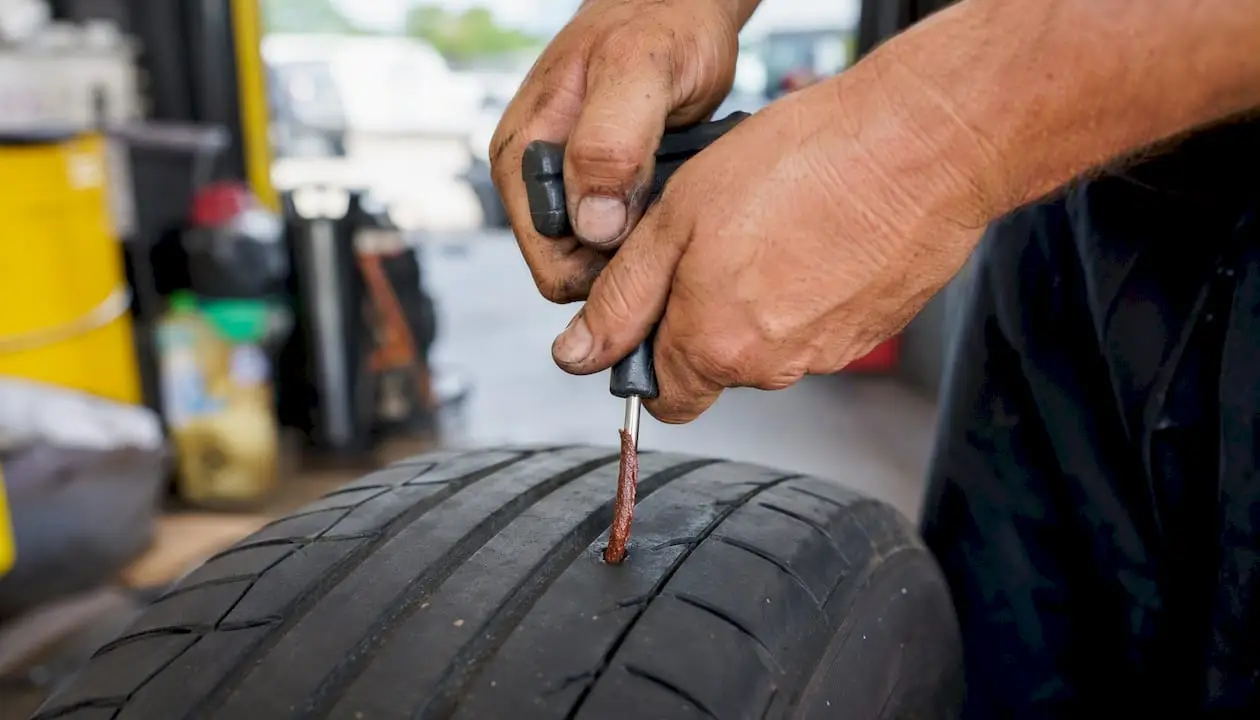
What you’ll need: a tire plug kit (available at most auto parts stores for roughly $10–$25 per AAA), a tire pressure gauge, and pliers.
Step-by-step temporary plug procedure:
- Leave the nail in place until you’re ready to plug. Removing it prematurely lets air escape faster.
- Use the reaming tool from the kit to clean and slightly widen the puncture channel. Insert it straight in and work it in and out a few times.
- Thread a plug strip through the insertion needle, leaving equal lengths on both sides.
- Push the needle with the plug into the hole until about 1/2 inch of plug remains outside the tire.
- Pull the needle straight out. The plug stays in the hole.
- Trim the excess plug flush with the tread using scissors or a knife.
- Re-inflate to the recommended PSI and check for air loss before driving.
Do not attempt a DIY plug if:
- The nail is in the sidewall, shoulder, or bead area.
- You can see visible cord or structural damage.
- The tire has already gone completely flat (internal damage is likely).
- There are two or more punctures close together.
Pro Tip: After plugging, drive no faster than 50 mph and head straight to a shop. The Tire Industry Association is clear that on-the-wheel string plugs are temporary and that a full demount and internal inspection are required before any repair is considered permanent.
Why the plug-patch method is the professional standard
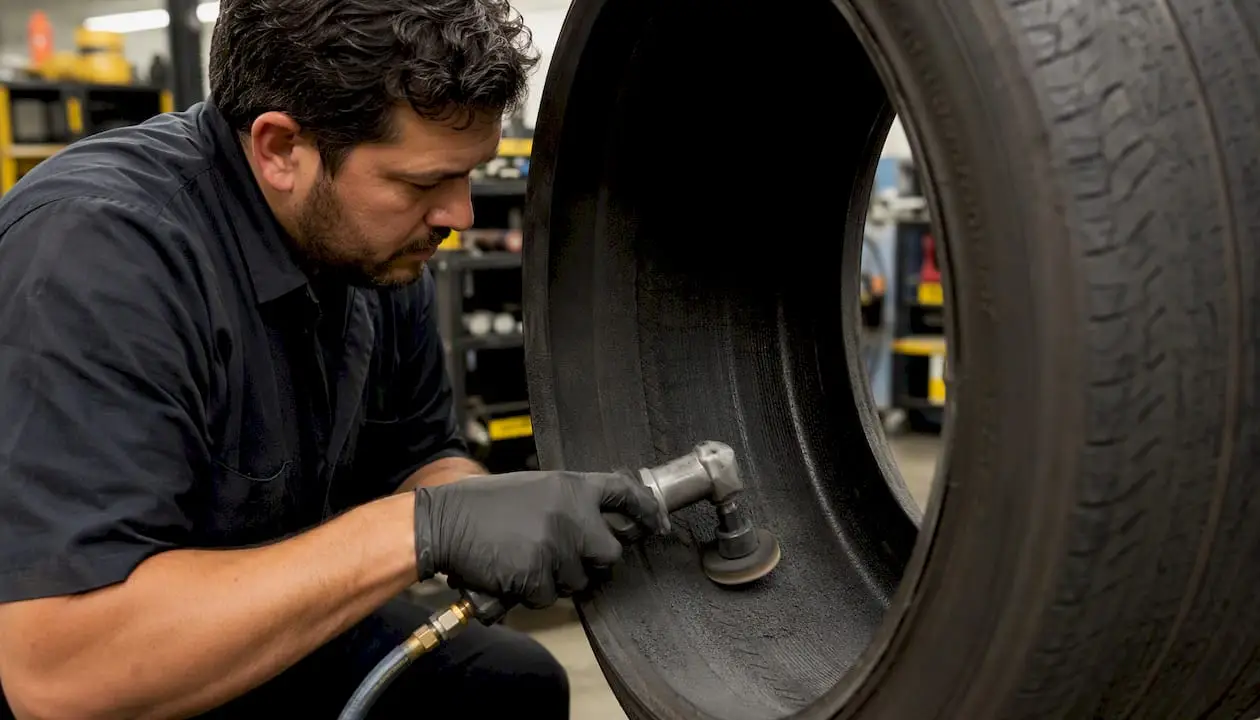
The professional standard for tire puncture repair is a two-part combination: a stem or vulcanizing fill through the puncture channel, plus a patch bonded to the innerliner from the inside. Plug-only repairs are not a permanent fix.
Here’s what a proper professional repair involves:
- Remove the tire from the rim completely.
- Inspect the inside of the tire for cord damage, innerliner tears, or belt separation.
- Buff the innerliner around the puncture to create a clean bonding surface.
- Fill the puncture channel with vulcanizing material or a rubber stem.
- Apply a combination plug-patch unit to seal the innerliner from the inside.
- Remount, inflate, and rebalance the tire.
The USTMA’s repair procedures require this two-part approach. Stand-alone plugs inserted from the outside, without demounting, are explicitly classified as temporary.
The Goodyear Product Service Bulletin reinforces this: shops must follow strict buffing depth limits and bonding procedures, and must scrap any tire where buffing exposes body ply cords. Repairs must never overlap.
On the regulatory side, 49 CFR 393.75 mandates two-part repairs for commercial vehicles. Many shops apply the same standard to passenger vehicles as a matter of safety practice.
Pro Tip: Ask your technician for a repair receipt that documents the method used, the puncture size, and its location. That record matters for tire warranty claims and, for fleet vehicles, regulatory compliance.
Look for ASE-certified technicians when choosing a shop. Certification means the tech has passed standardized testing on repair procedures, including tire work.
When you need to replace the tire instead of repairing it
Some tires cannot be saved, and driving on one that should be replaced is a serious safety risk. Replace the tire when any of the following apply:
- The puncture is in the sidewall, shoulder, or bead area.
- The hole is larger than 1/4 inch (6mm) in diameter.
- The entry angle runs into the shoulder belt, even if the surface entry point looks like tread.
- Cord or belt material is visible through the puncture or tread surface.
- Tread depth is at or below 2/32 of an inch (the legal minimum in most U.S. states).
- There is evidence of heat damage or underinflation damage on the innerliner.
- Two or more previous repairs are already in the same area, or a new repair would overlap an existing one.
- The tire ran flat or severely underinflated for any distance, which can cause internal structural damage invisible from the outside.
Per NHTSA guidance, exposed cord fabric is a key disqualifier. A nail hole that has been properly vulcanized from the inside can be sound; a tire with exposed cords cannot be repaired safely.
What a tire repair actually costs and how long it takes
A professional plug-patch repair generally costs from around twenty to mid-forties dollars at most shops, depending on the tire type, labor rates, and whether dismounting and rebalancing are included as separate line items, as explained in our comprehensive dent repair cost factors guide. Some shops bundle everything; others itemize.
A DIY plug kit costs roughly $10–$25, per AAA, but that comparison is misleading. A plug kit is a temporary emergency tool. It does not include the internal inspection, buffing, innerliner patch, or rebalancing that a professional repair provides. Comparing their costs is like comparing a bandage to stitches.
Time on-site for a proper professional repair, including demounting, inspection, repair, remounting, and rebalancing, usually ranges from about half an hour to an hour. A tire replacement takes similar time. Either way, same-day service is standard at most full-service shops.
Factors that affect cost:
- Tire size and type (run-flat tires often cannot be repaired at all).
- Whether rebalancing is included or billed separately.
- Shop labor rates, which vary by region.
- Whether the shop charges a disposal fee for replaced tires.
Always ask for an itemized receipt. It should document the repair method, puncture size, and location. That documentation matters for state inspection records and any future warranty claim.
Temporary fixes and their real risks
String plugs, aerosol tire sealants, and inflator cans all have a place in a roadside emergency. None of them are a substitute for a proper repair.
Common temporary options and their limits:
- String plug kits: Effective for short-distance, low-speed driving to a shop. They do not seal the innerliner and cannot detect internal damage.
- Aerosol sealants (foam-type): Can get you moving but coat the inside of the tire with a substance that complicates professional repair and can damage TPMS sensors.
- Tire inflator cans: Useful for a slow leak, but the sealant residue creates the same problem as aerosol products.
- On-the-wheel repairs: Faster but inherently incomplete. The inside of the tire remains uninspected.
The core risk with all temporary fixes is false confidence. A tire that holds pressure after a plug may still have cord damage or innerliner separation that will fail under highway stress.
Pro Tip: If you use any temporary fix, get to a shop within 24–48 hours, or sooner if pressure drops again. Tell the technician exactly what product you used so they can assess whether the innerliner is still patchable.
Kwik Kar handles nail puncture repairs the right way in Irving, TX

When a nail finds your tire, the last thing you need is a shop that plugs it from the outside and sends you on your way. At Kwik Kar in Irving, TX, our ASE-certified technicians follow the full professional process: demount, internal inspection, buff, fill, innerliner patch, remount, and rebalance. Every repair comes with a Digital Vehicle Inspection sent directly to your phone, with photos and technician notes so you can see exactly what was found and what was done.
If the tire isn’t repairable, we’ll tell you straight and show you why. No pressure, no guesswork. Check our current service specials and book your auto repair appointment today.
Sources
- Tire Repair | Tire Industry Association
- Tire Plug vs. Patch: Get the Right Tire Repair | AAA Automotive
- NHTSA interpretation on repairs and exposed cord fabric
- Product Service Bulletin: Proper tire repair for auto and light truck tires (Goodyear)
FAQ
Can a tire be repaired with a nail in it?
Yes, if the nail is in the center tread and the puncture is no larger than 1/4 inch (6mm). Sidewall and shoulder punctures are not repairable under USTMA guidelines.
Is it safe to drive with a nail in my tire?
For a short, low-speed trip to a shop, it can be safe if pressure is holding steady and the nail is in the center tread. If the tire is losing pressure rapidly or the nail is in the sidewall, stop driving immediately.
How much does it cost to fix a nail in a tire?
A professional plug-patch repair generally costs from around twenty to mid-forties dollars at most shops, depending on labor rates and whether rebalancing is included. A DIY plug kit runs roughly $10–$25 but is a temporary fix only, not a permanent repair.
Is it better to plug or patch a nail in a tire?
Neither alone is the professional standard. The correct repair is a combination plug-patch: the puncture channel is filled and an innerliner patch is bonded from the inside after demounting. A plug-only repair is classified as temporary by USTMA and AAA.